DIY on the Farm: How to Make Your Own Harvest Bag!
Learn how to create harvest bags that you can use in your garden or production fields. In this blog post you’ll get: a shopping list, cost estimate, and a step-by-step sewing guide!
Right now, you’re likely towards the end of harvesting your early spring brassicas – we are too at Columbia Center for Urban Agriculture! For us, it’s the calm before the storm, the few weeks before we can’t keep up with our tomatoes and peppers during the dog days of summer.
During the wintertime last year, CCUA’s Planting for the Pantry team sewed some new harvest bags that we’ll be testing this summer. We’re excited to try them out and share with you how to make one yourself in this blog post!
While making your own harvest bags is a great winter project while you’re dreaming of spring, it also makes an excellent rainy-day project. So definitely bookmark this and come back!
What is a harvest bag?
First, what is a harvest bag? Easy definition: it’s a pouch or satchel that’s used for harvesting. These bags are used in lieu of plastic totes or baskets down a row or through an orchard. While almost any vessel will do when it comes to collecting your harvest, for sturdy hot crops like peppers and okra, we find harvest bags very useful as they allow you to move, bend, and crouch hunting for your ripe produce without dropping what you’ve already harvested.
There are three main styles of harvest bags that are on the market today:
Full-Torso Apron: This style of harvest bag is a full-body apron. Below or at the waist, there is a pouch with single or multiple wide pockets. Depending on the design, this pouch can be unlatched at the bottom, allowing the wearer to easily drop the produce into totes or baskets.
A common vendor of this style of harvest bag, which we also use at the CCUA too, is the Roo.
Belted Apron: This is very similar to the full-torso apron, except that it sits at the beltline only. These may have less capacity than the full-torso style due to the lack-of-full body support. They may or may not have the unlatching mechanism at the bottom as well.
Belted Bucket: Despite having a “bucket” style, these are typically made of fabric. A belted bucket harvest bag is either attached to an apron or belted at the waist and often has a firm circular structure at the top to keep it propped open. These have a larger holding capacity and usually don’t unlatch at the bottom.
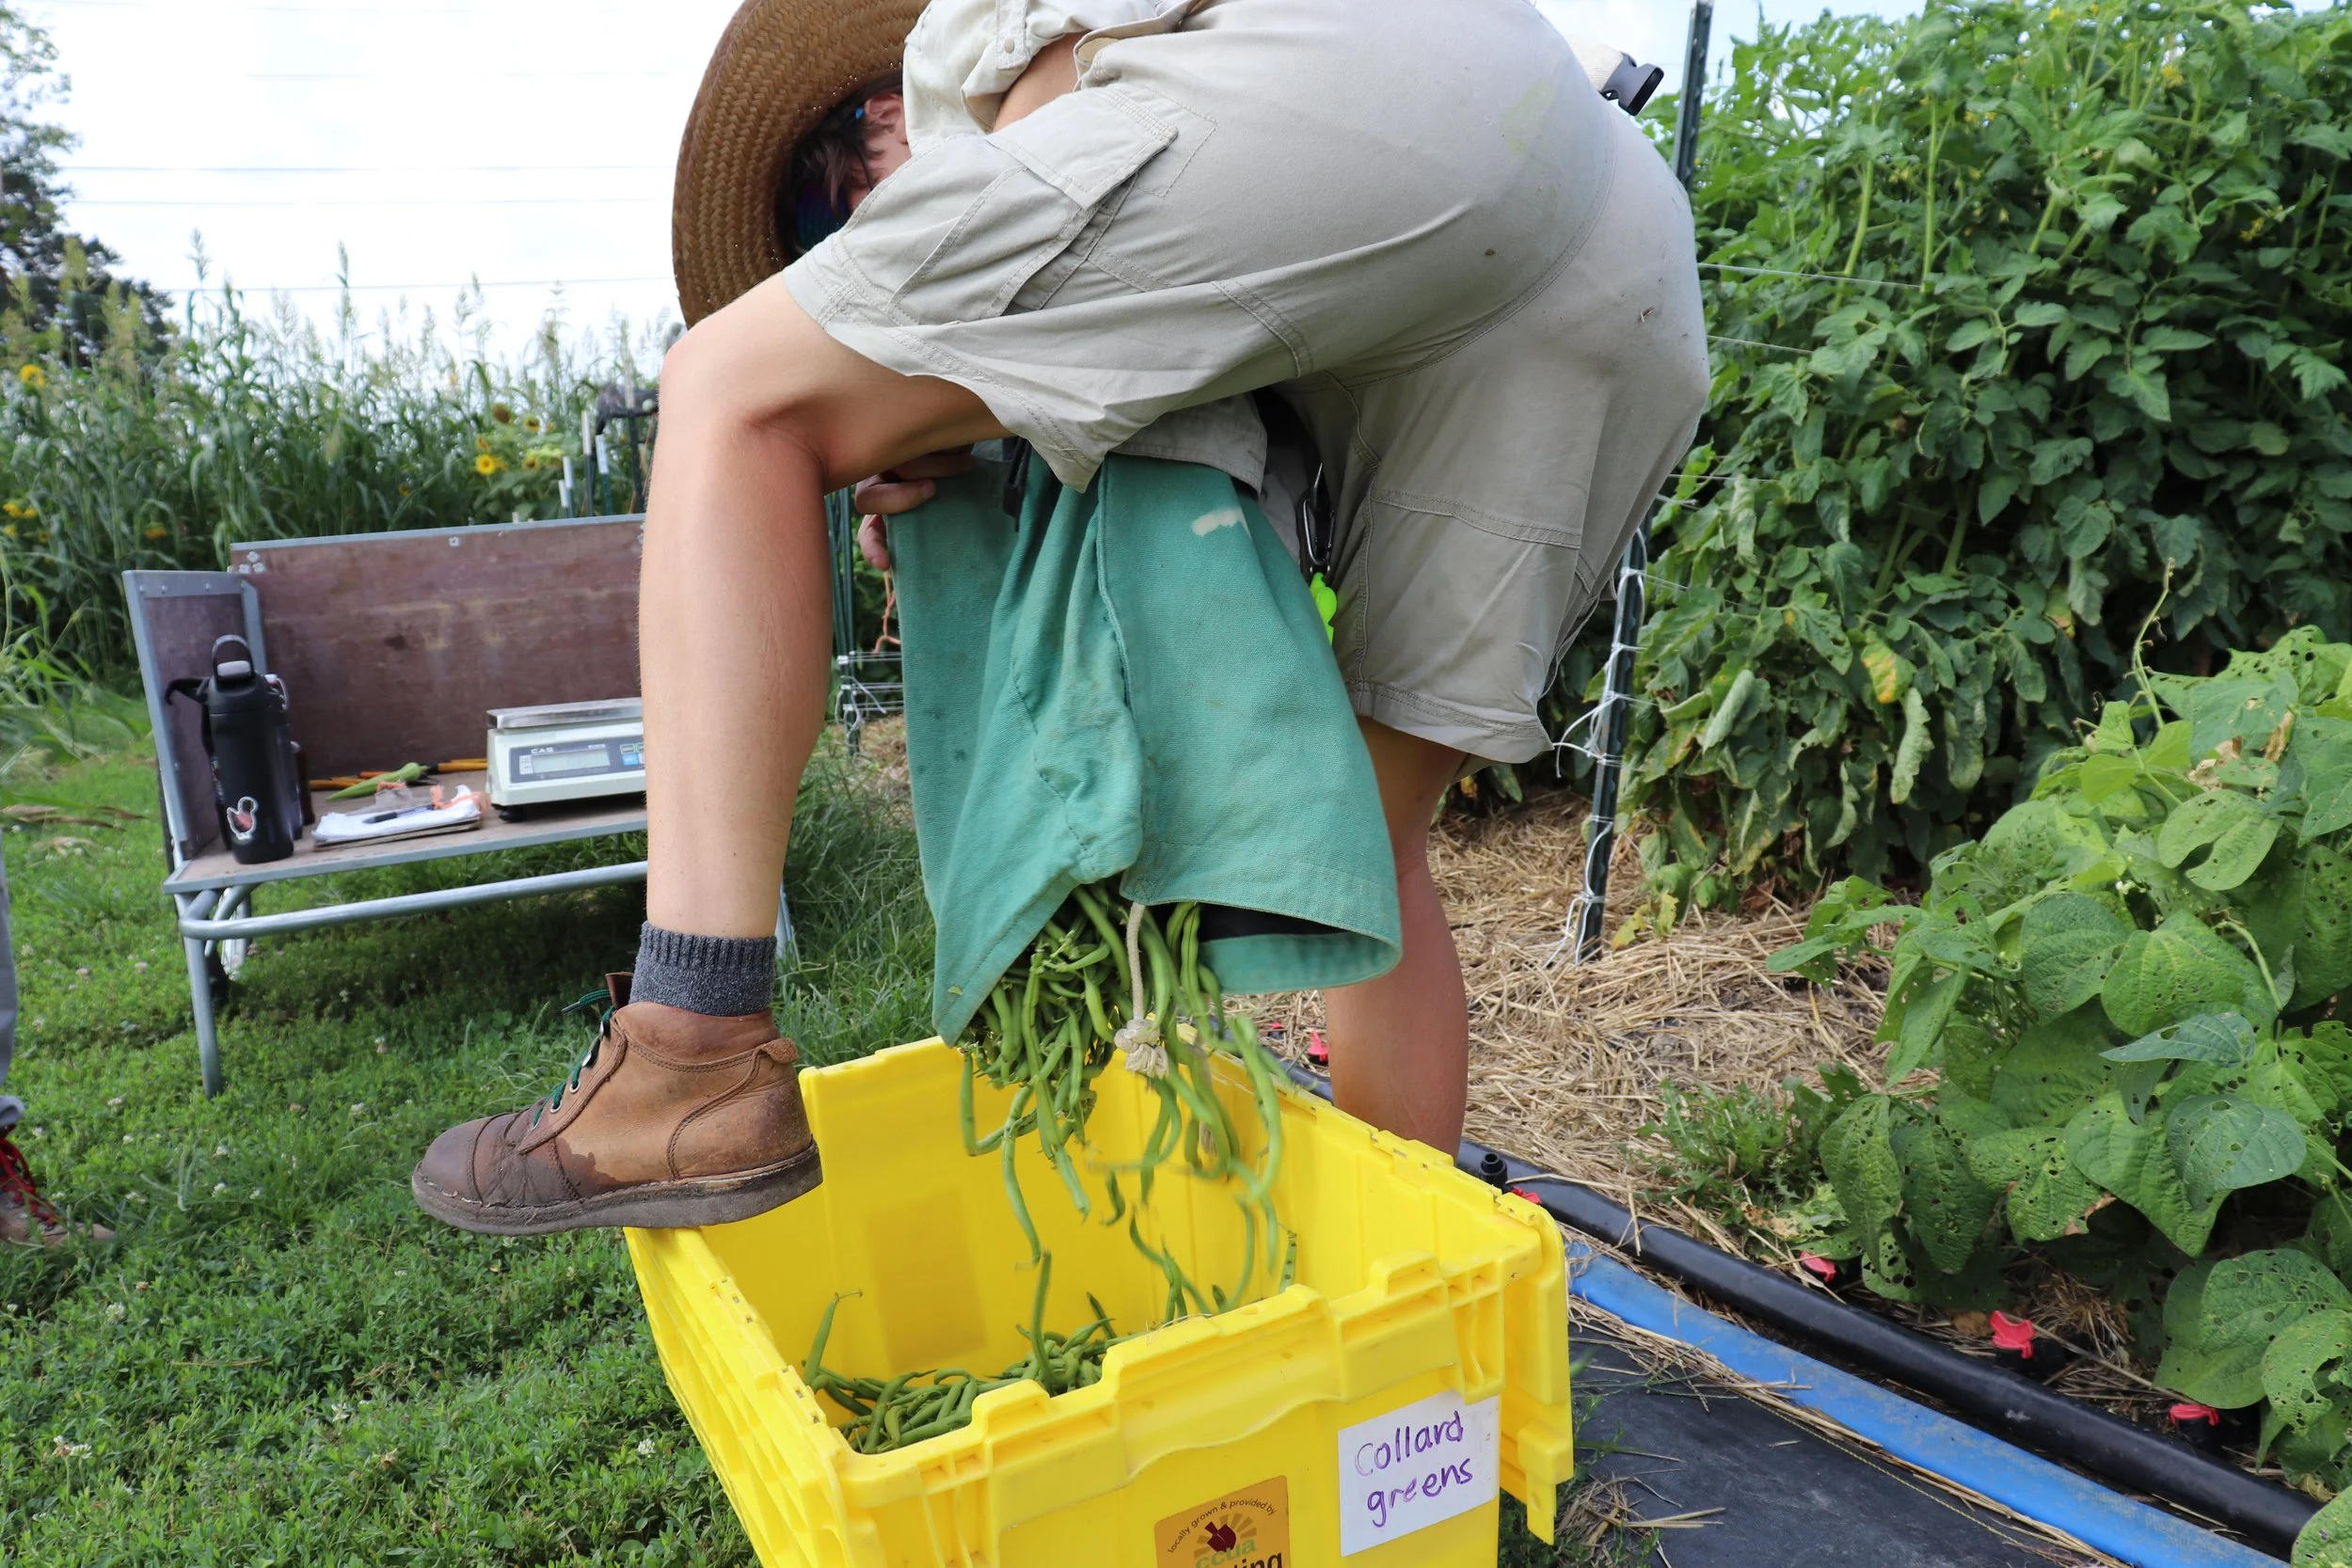
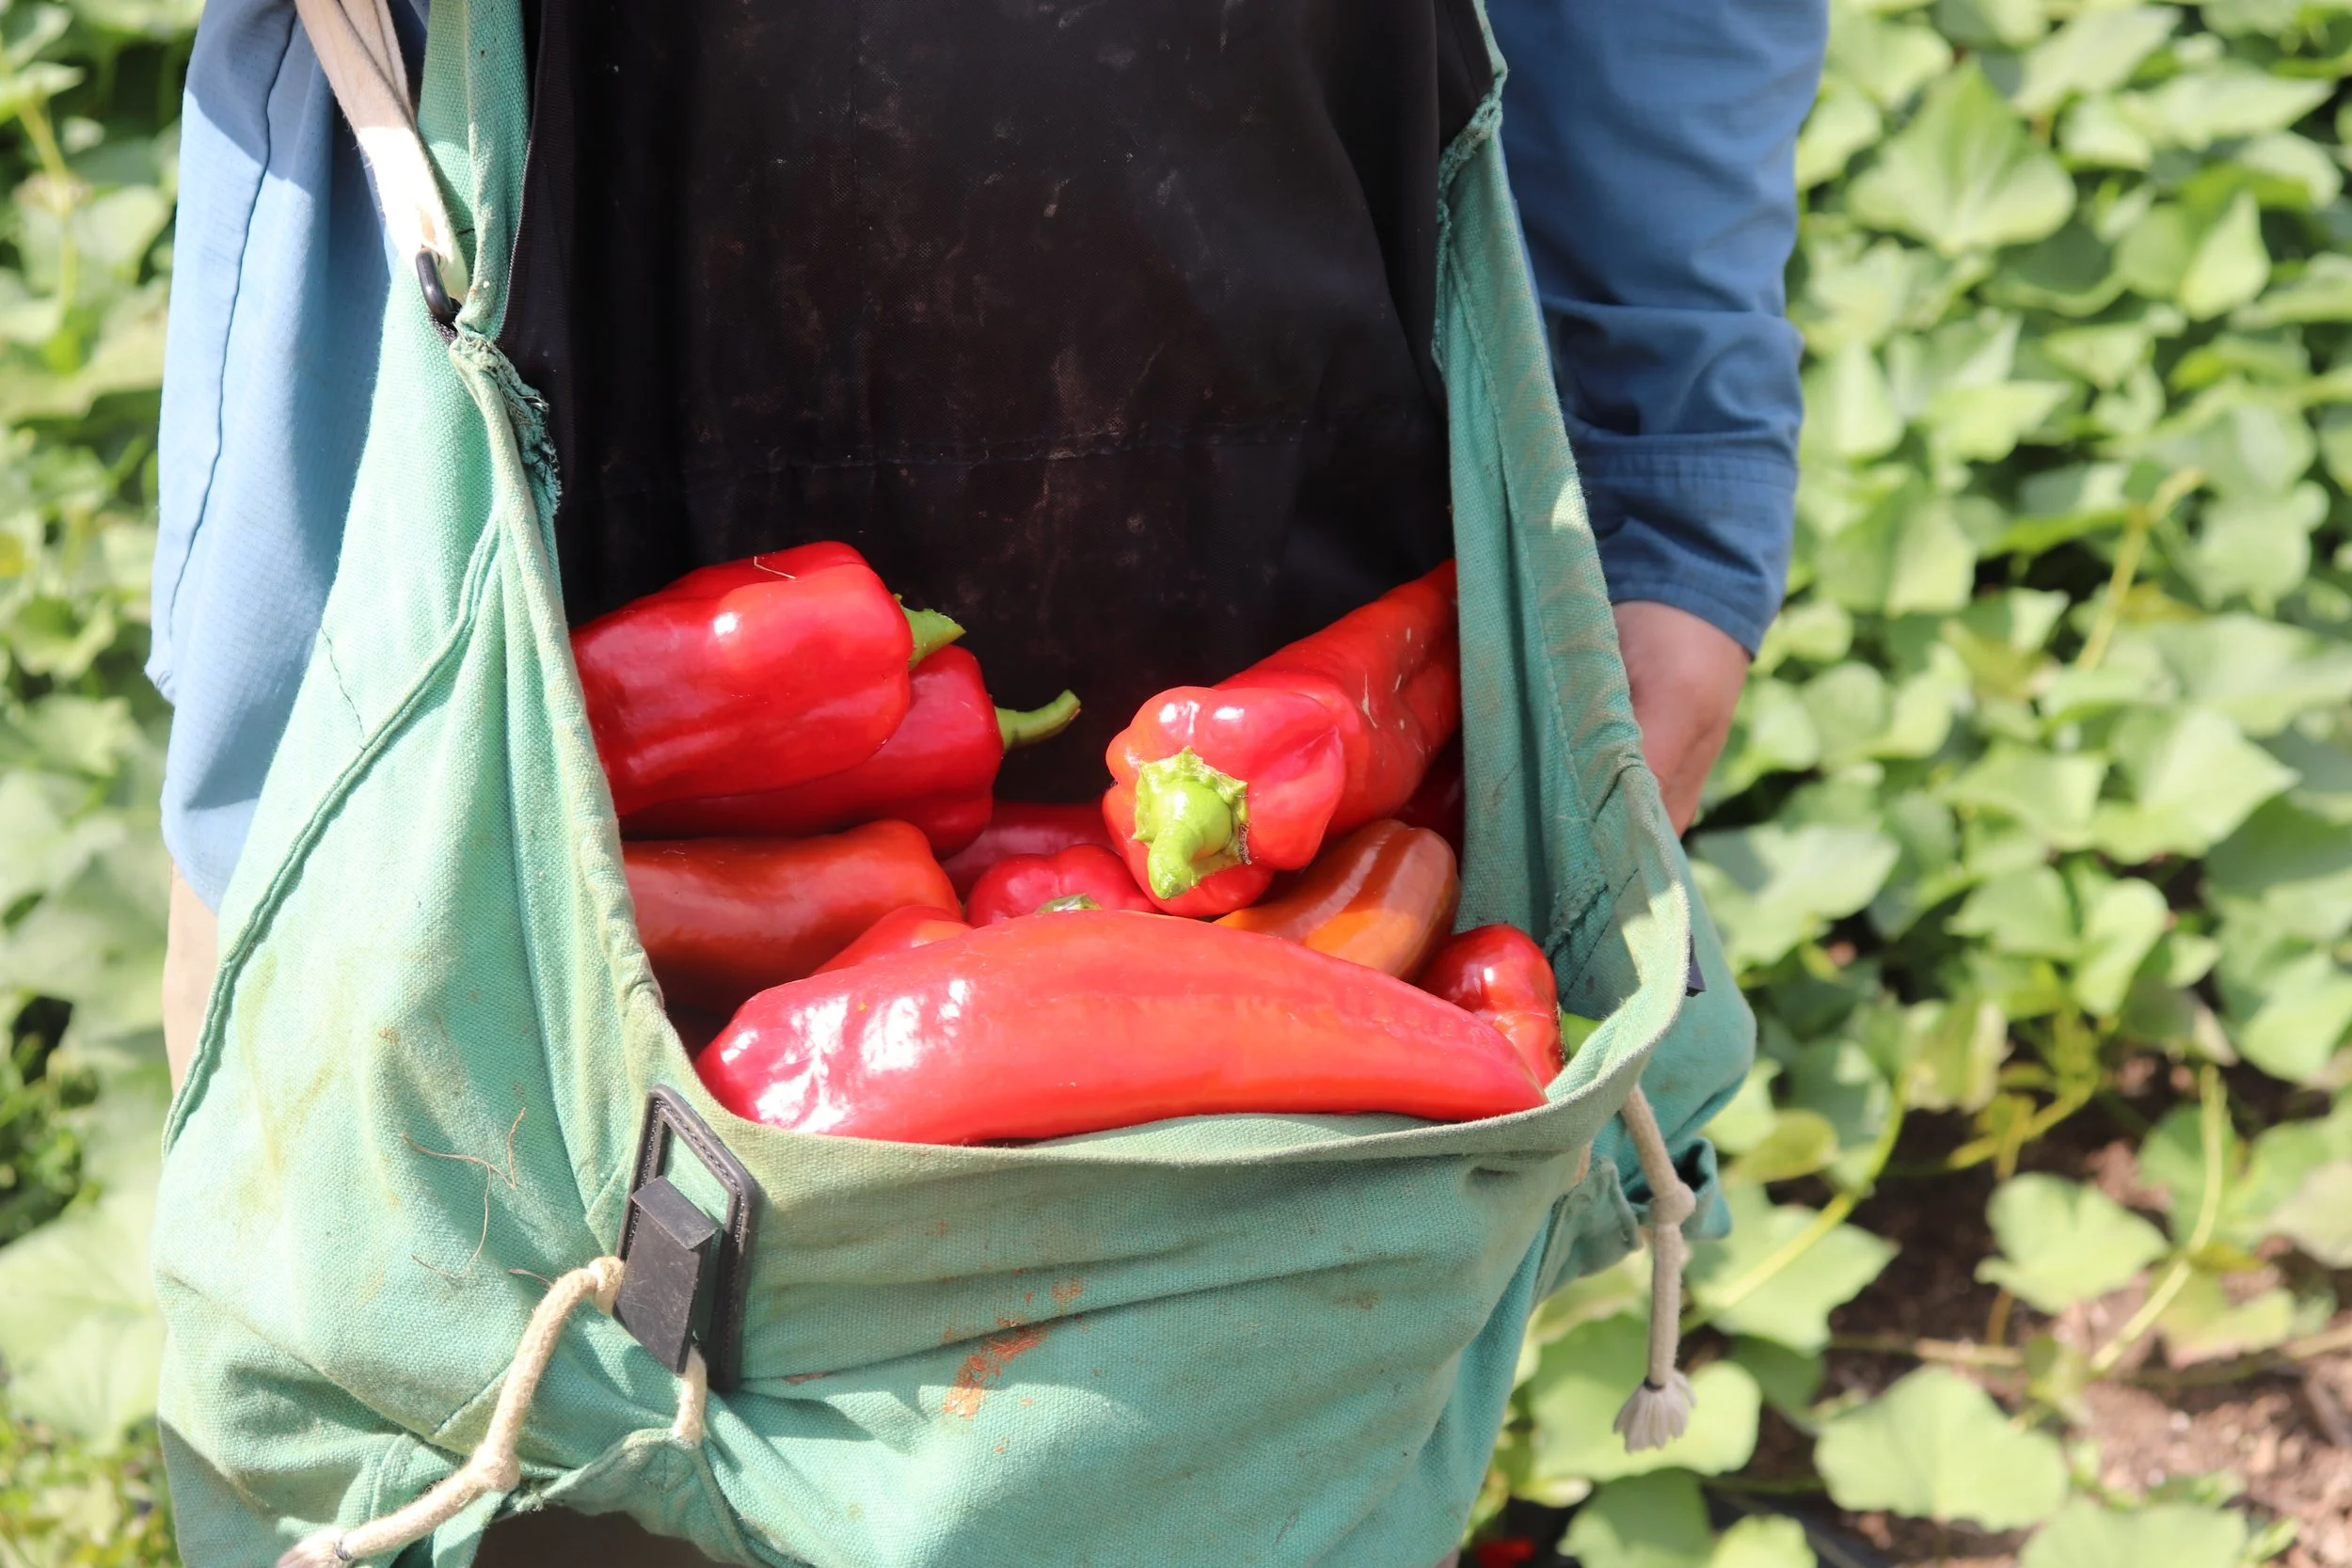
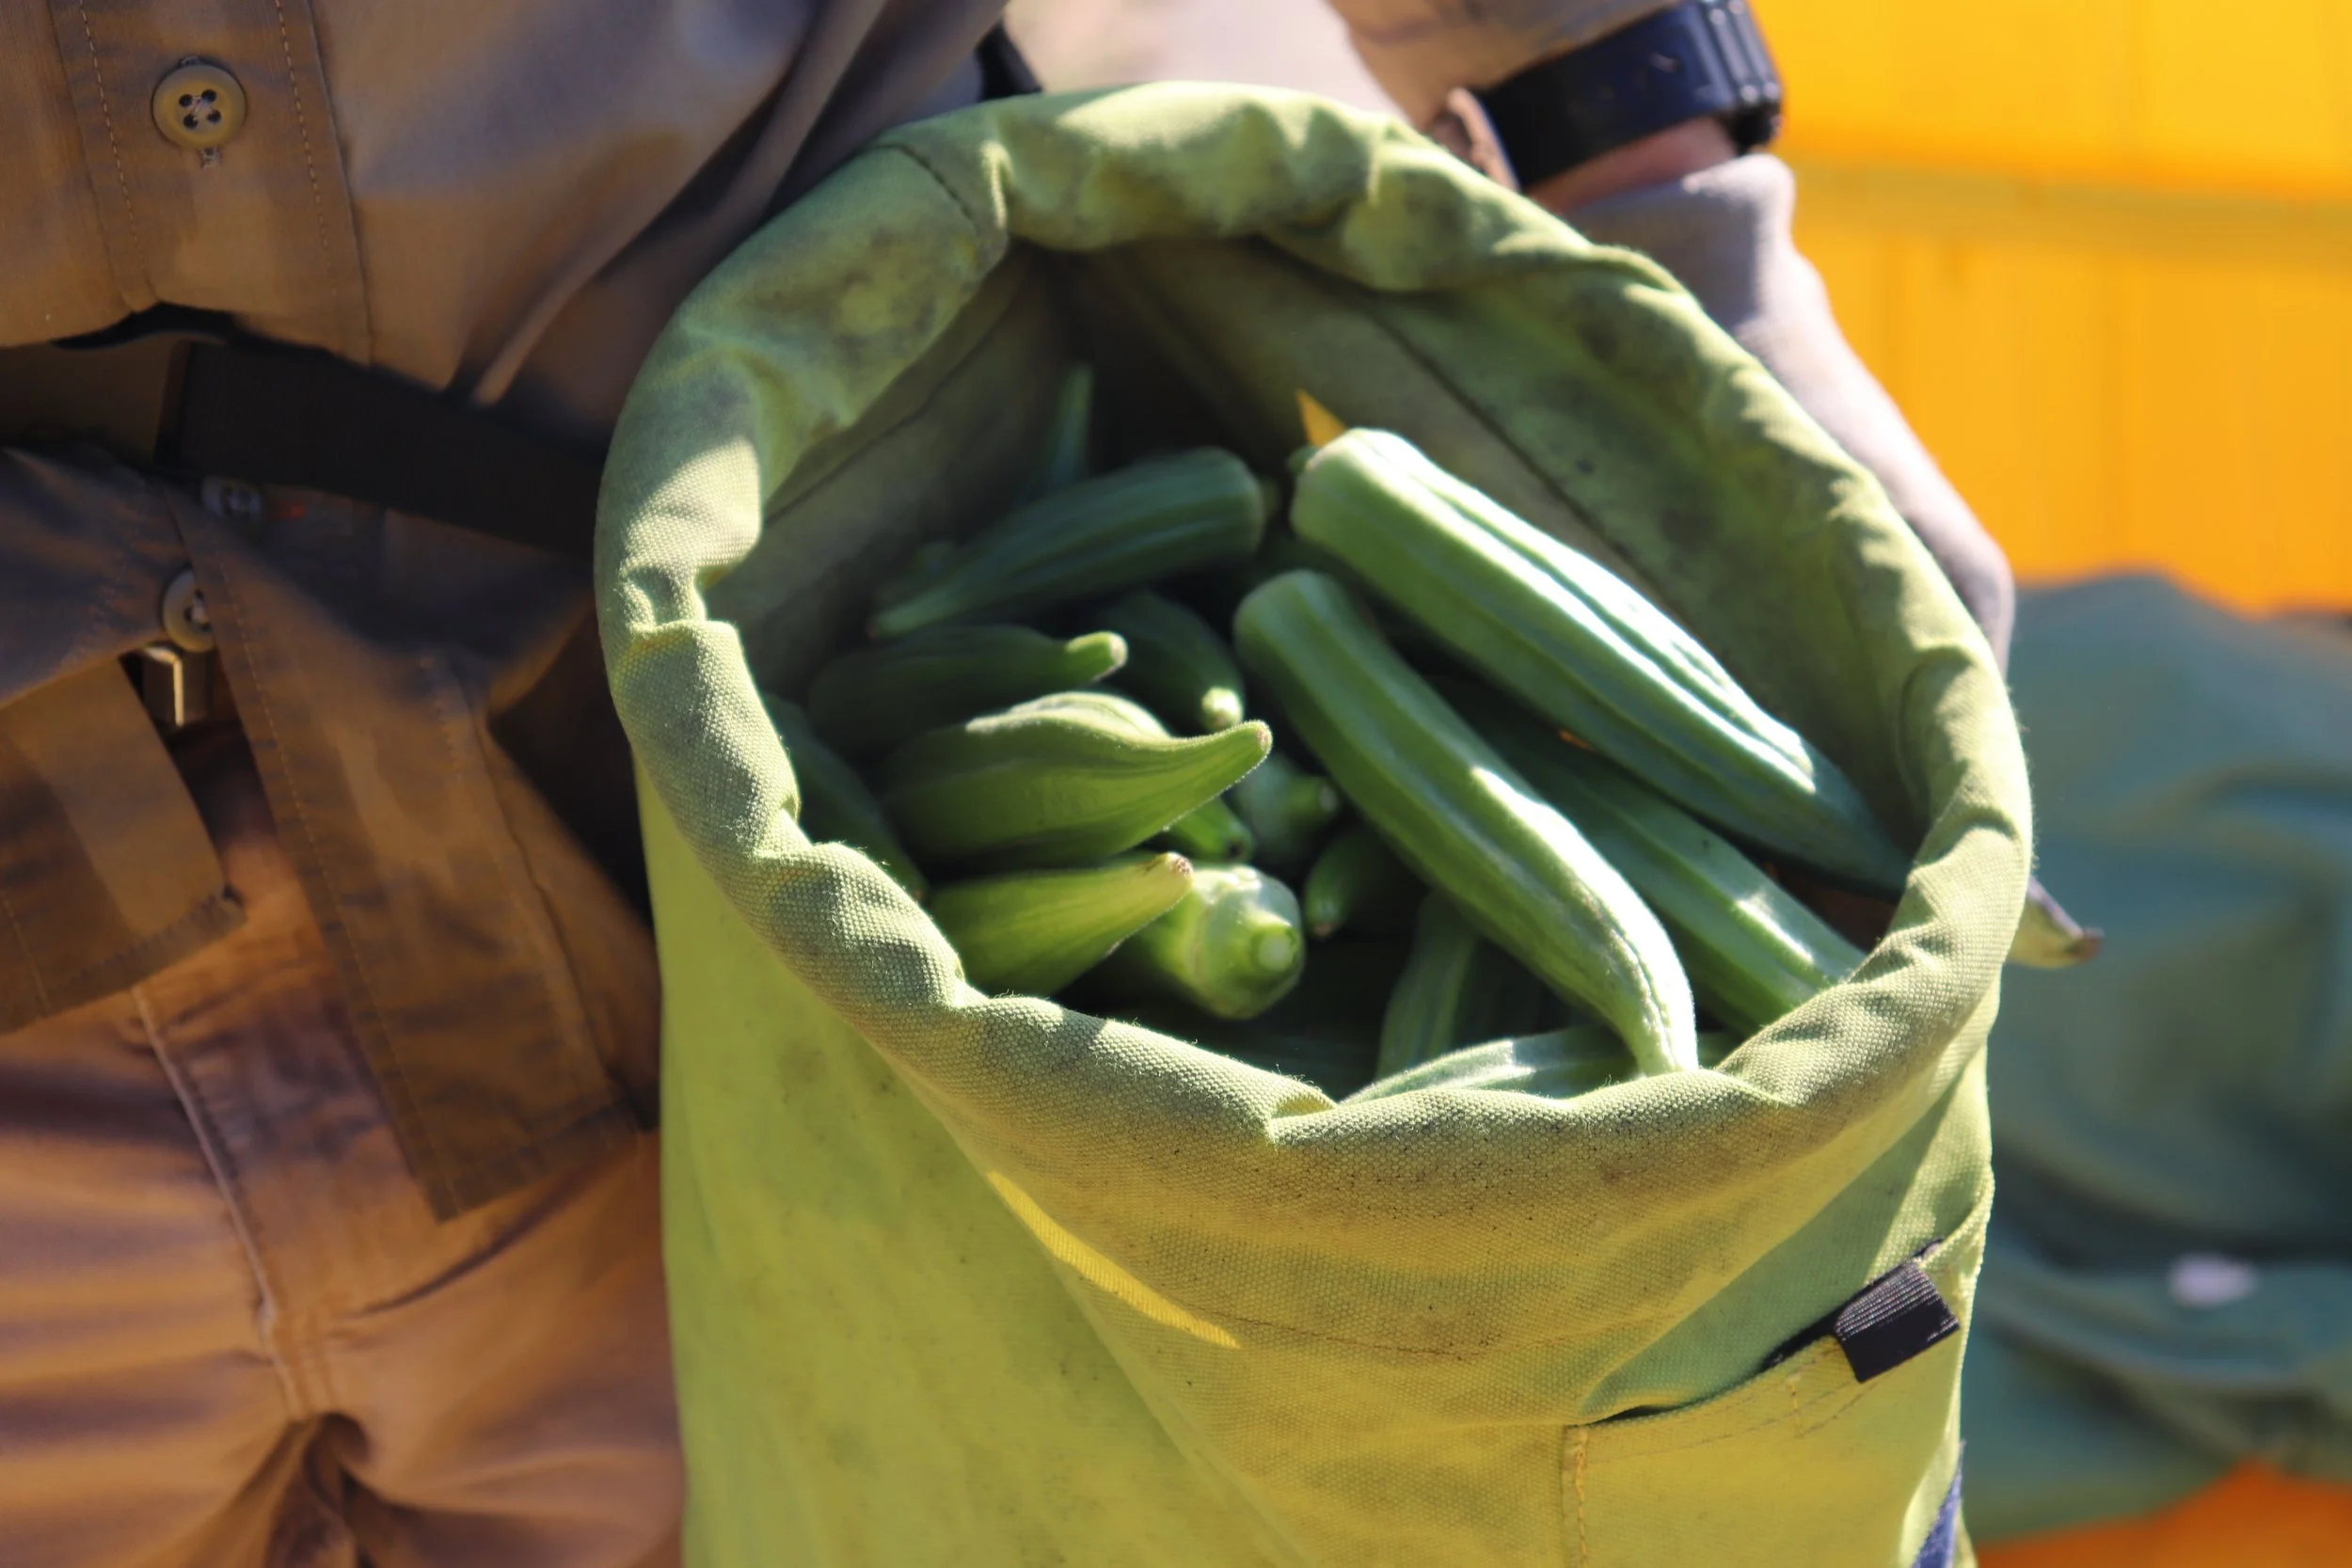
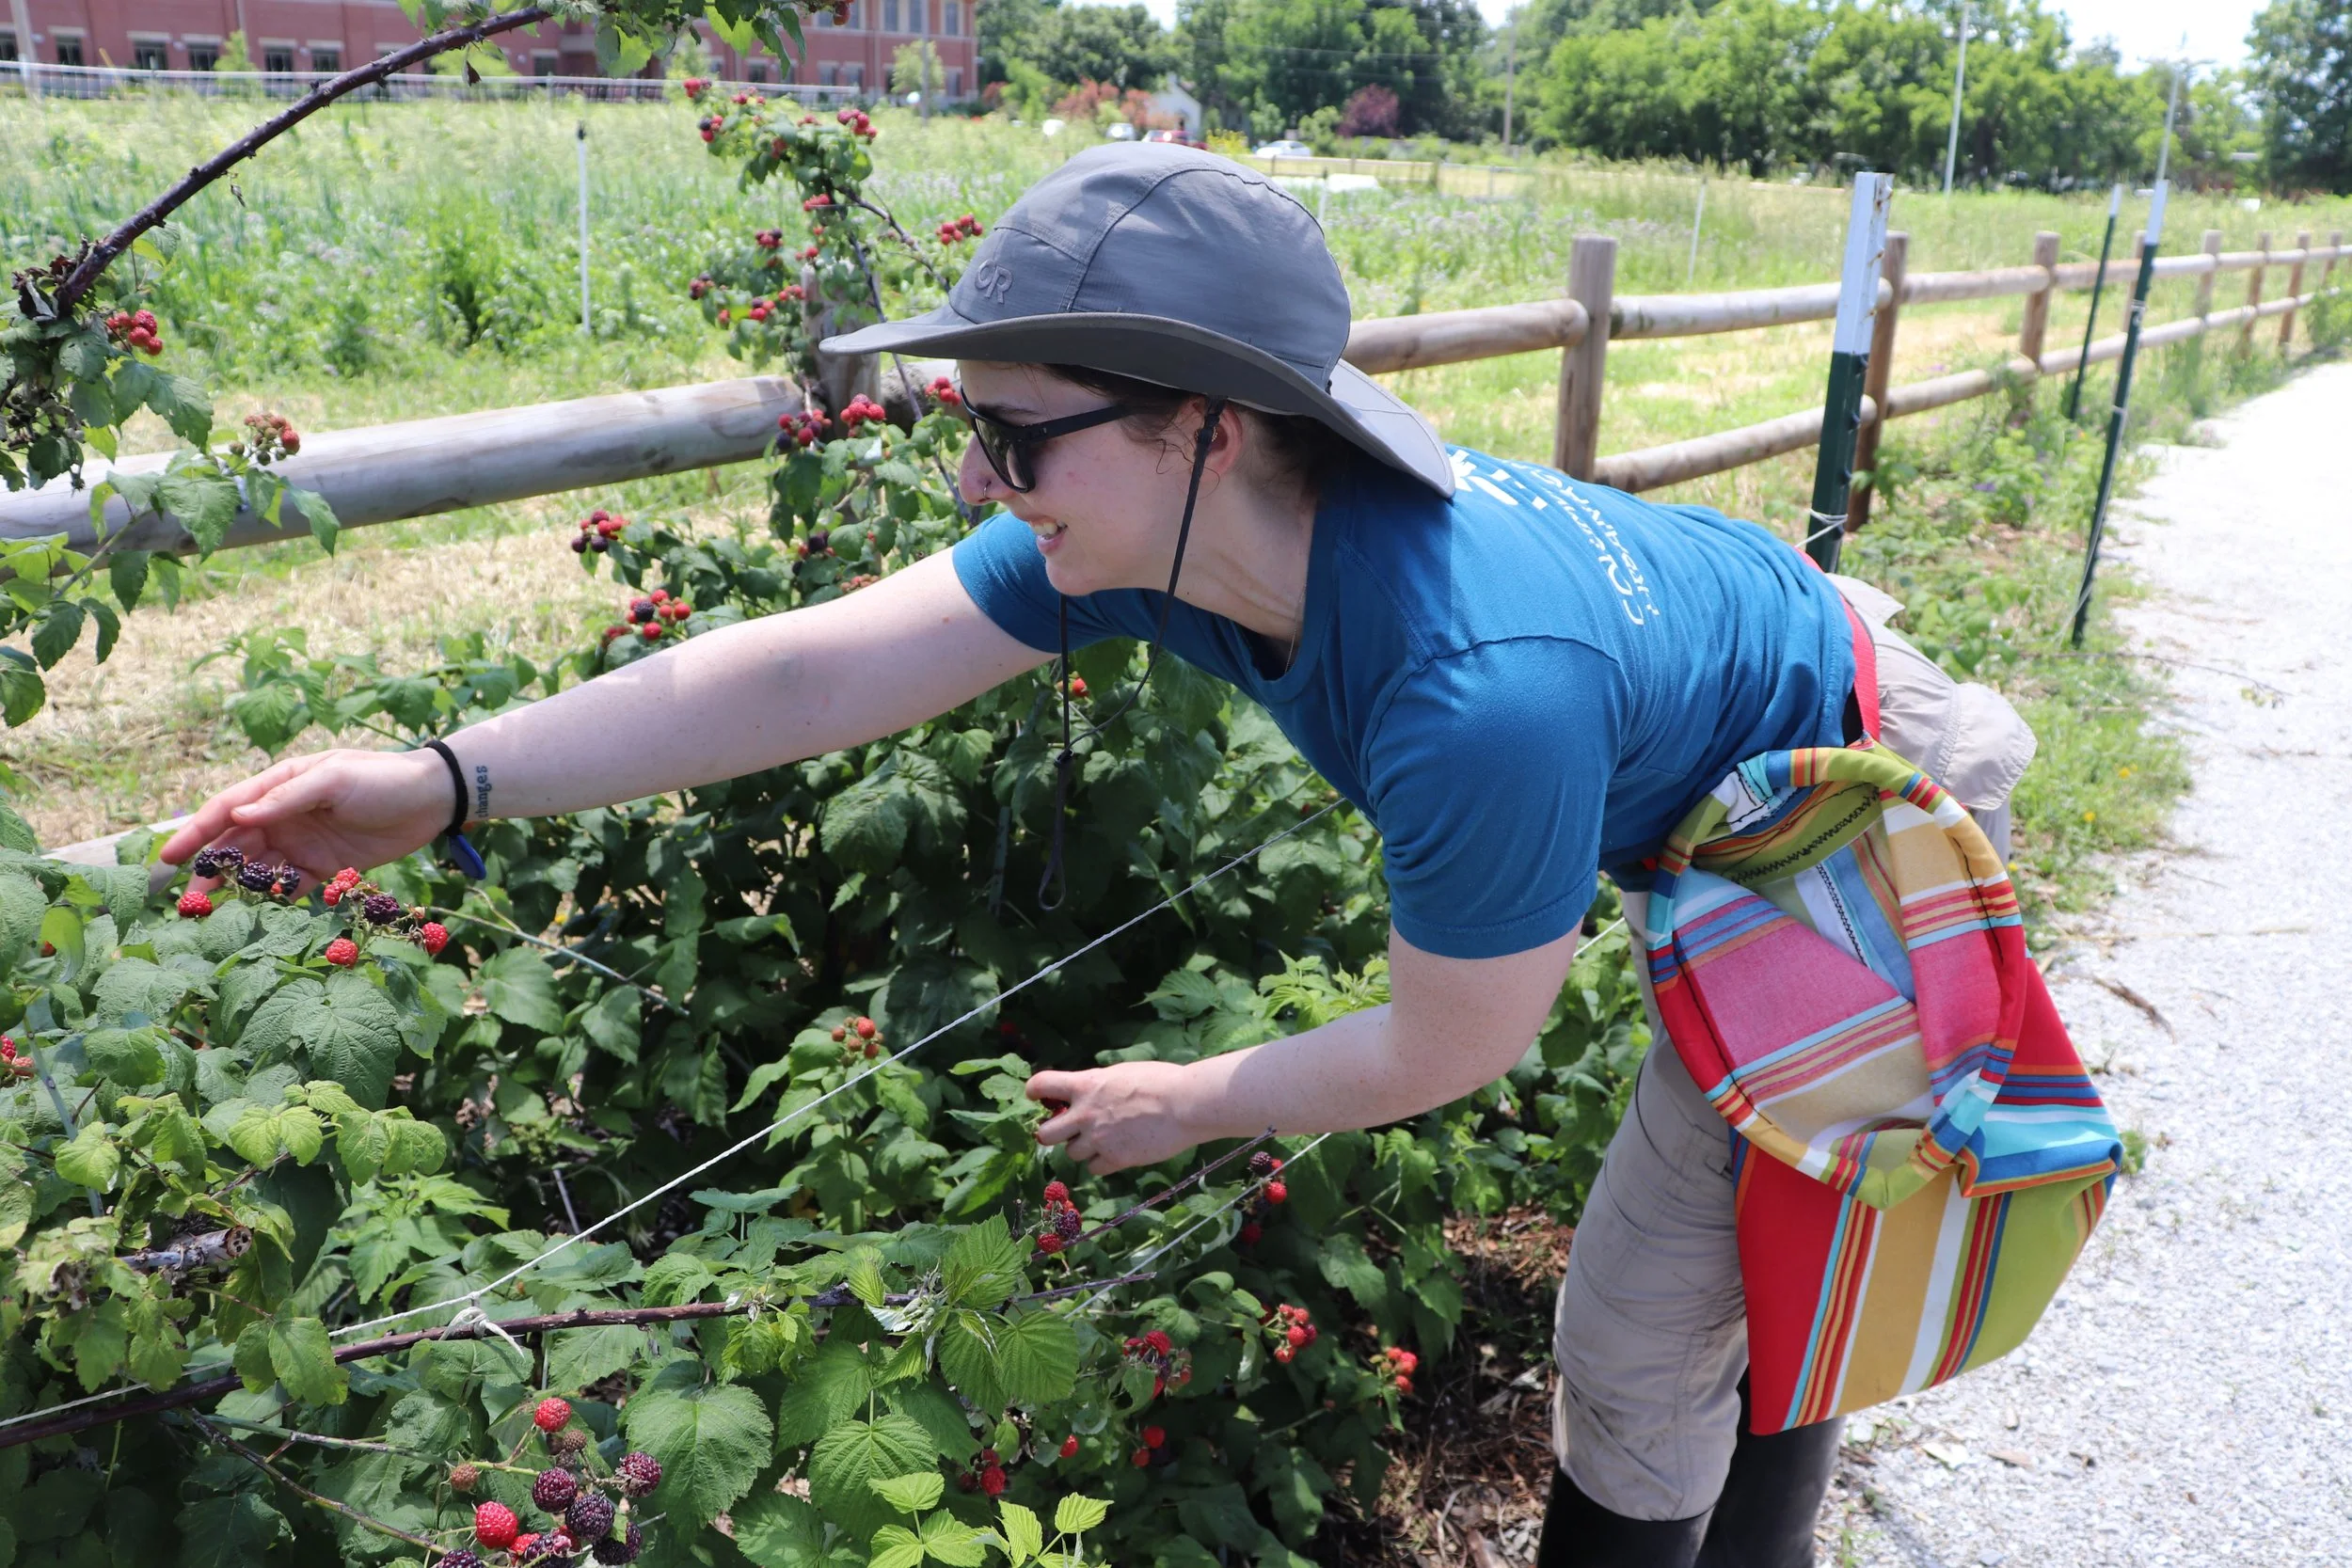
Some of our conventional (and less conventional) ways of using harvest bags to collect our produce!
Advantages of a Bucket Harvest Bag
At the CCUA, we purchased The Gardener’s Hollow Leg previously. We love this style of bag!
While the apron styles of the harvest bag are more readily available on the market, the bucket style of bag has
Greater carrying capacity
More stability due to the lack of an unlatching pouch
But when we looked to purchase more, it appeared the company was out of business! Rather than wallow in despair at this injustice, we examined the bag closely, and wondered if we could replicate this harvest bag style ourselves. One of our teammates had a sewing machine, so we got to work!
Creating Your Own Belted Bucket Harvest Bag
Supplies Needed for Your Harvest Bag—Before you get started on cutting and sewing, here’s what you’ll need for your bag and where you can get the materials. We only have Hobby Lobby and Michaels in our town, and that’s where the supplies for the bags came from.
This will make two bags:
1 1/8 yard outdoor fabric that is weather/water resistant (Michaels is cheaper than Hobby Lobby)
Two parachute buckles (Hobby Lobby—Michaels didn’t carry them)
8 feet of Nylon Webbing (Hobby Lobby—purchase from sewing counter not pre-packaged, much cheaper)
1 pack of strap adjusters (Hobby Lobby—comes in a two pack)
1 spool heavy-duty thread (Hobby Lobby or Michaels)
6 feet of vinyl tubing (Ace Hardware - ⅜ x 9/16 - it’s in their bulk plumbing section)
You will also need the following supplies:
Sewing machine
Iron
Fabric Shears
Straight Pins
Sewing Tape Measure
Sewing Scissors
Optional supplies that will make your life easier:
Layflat/Tubing Cutters
Higher Gauge Sewing Machine Needle (16-18 gauge - not required but recommended)
Pinking Shears
Rotary Cutter
Cost of Creating a Belted Bucket Harvest Bag
If you’re curious how much supplies will cost to create your own harvest bag, here are the costs associated with the project when we made our bags:
Fabric: $6.99 per yard
Strap: ~$5.96 for 8 feet of nylon webbing (makes two straps)
Parachute Buckle: $2.62 x 2
Strap Adjusters: $1.49 (comes in a two pack)
Thread: $2.99
Tubing: $9.54
Grand Total: $29.59 for two bags, tax not included. $14.79 per bag.
Harvest Bag Assembly Instructions
Preparation
Assemble supplies.
Iron fabric on recommended setting.
Take your yard of fabric and cut it in half horizontally. This will cut to a 3.25 feet wide (39 inches) and 2 feet long section of fabric. These are the original sizes of the bag. The remaining 1/8th of a yard is to be used for the patches.
Tip: Cutting using pinking shears can help with fraying.
Bag Body Assembly Instructions
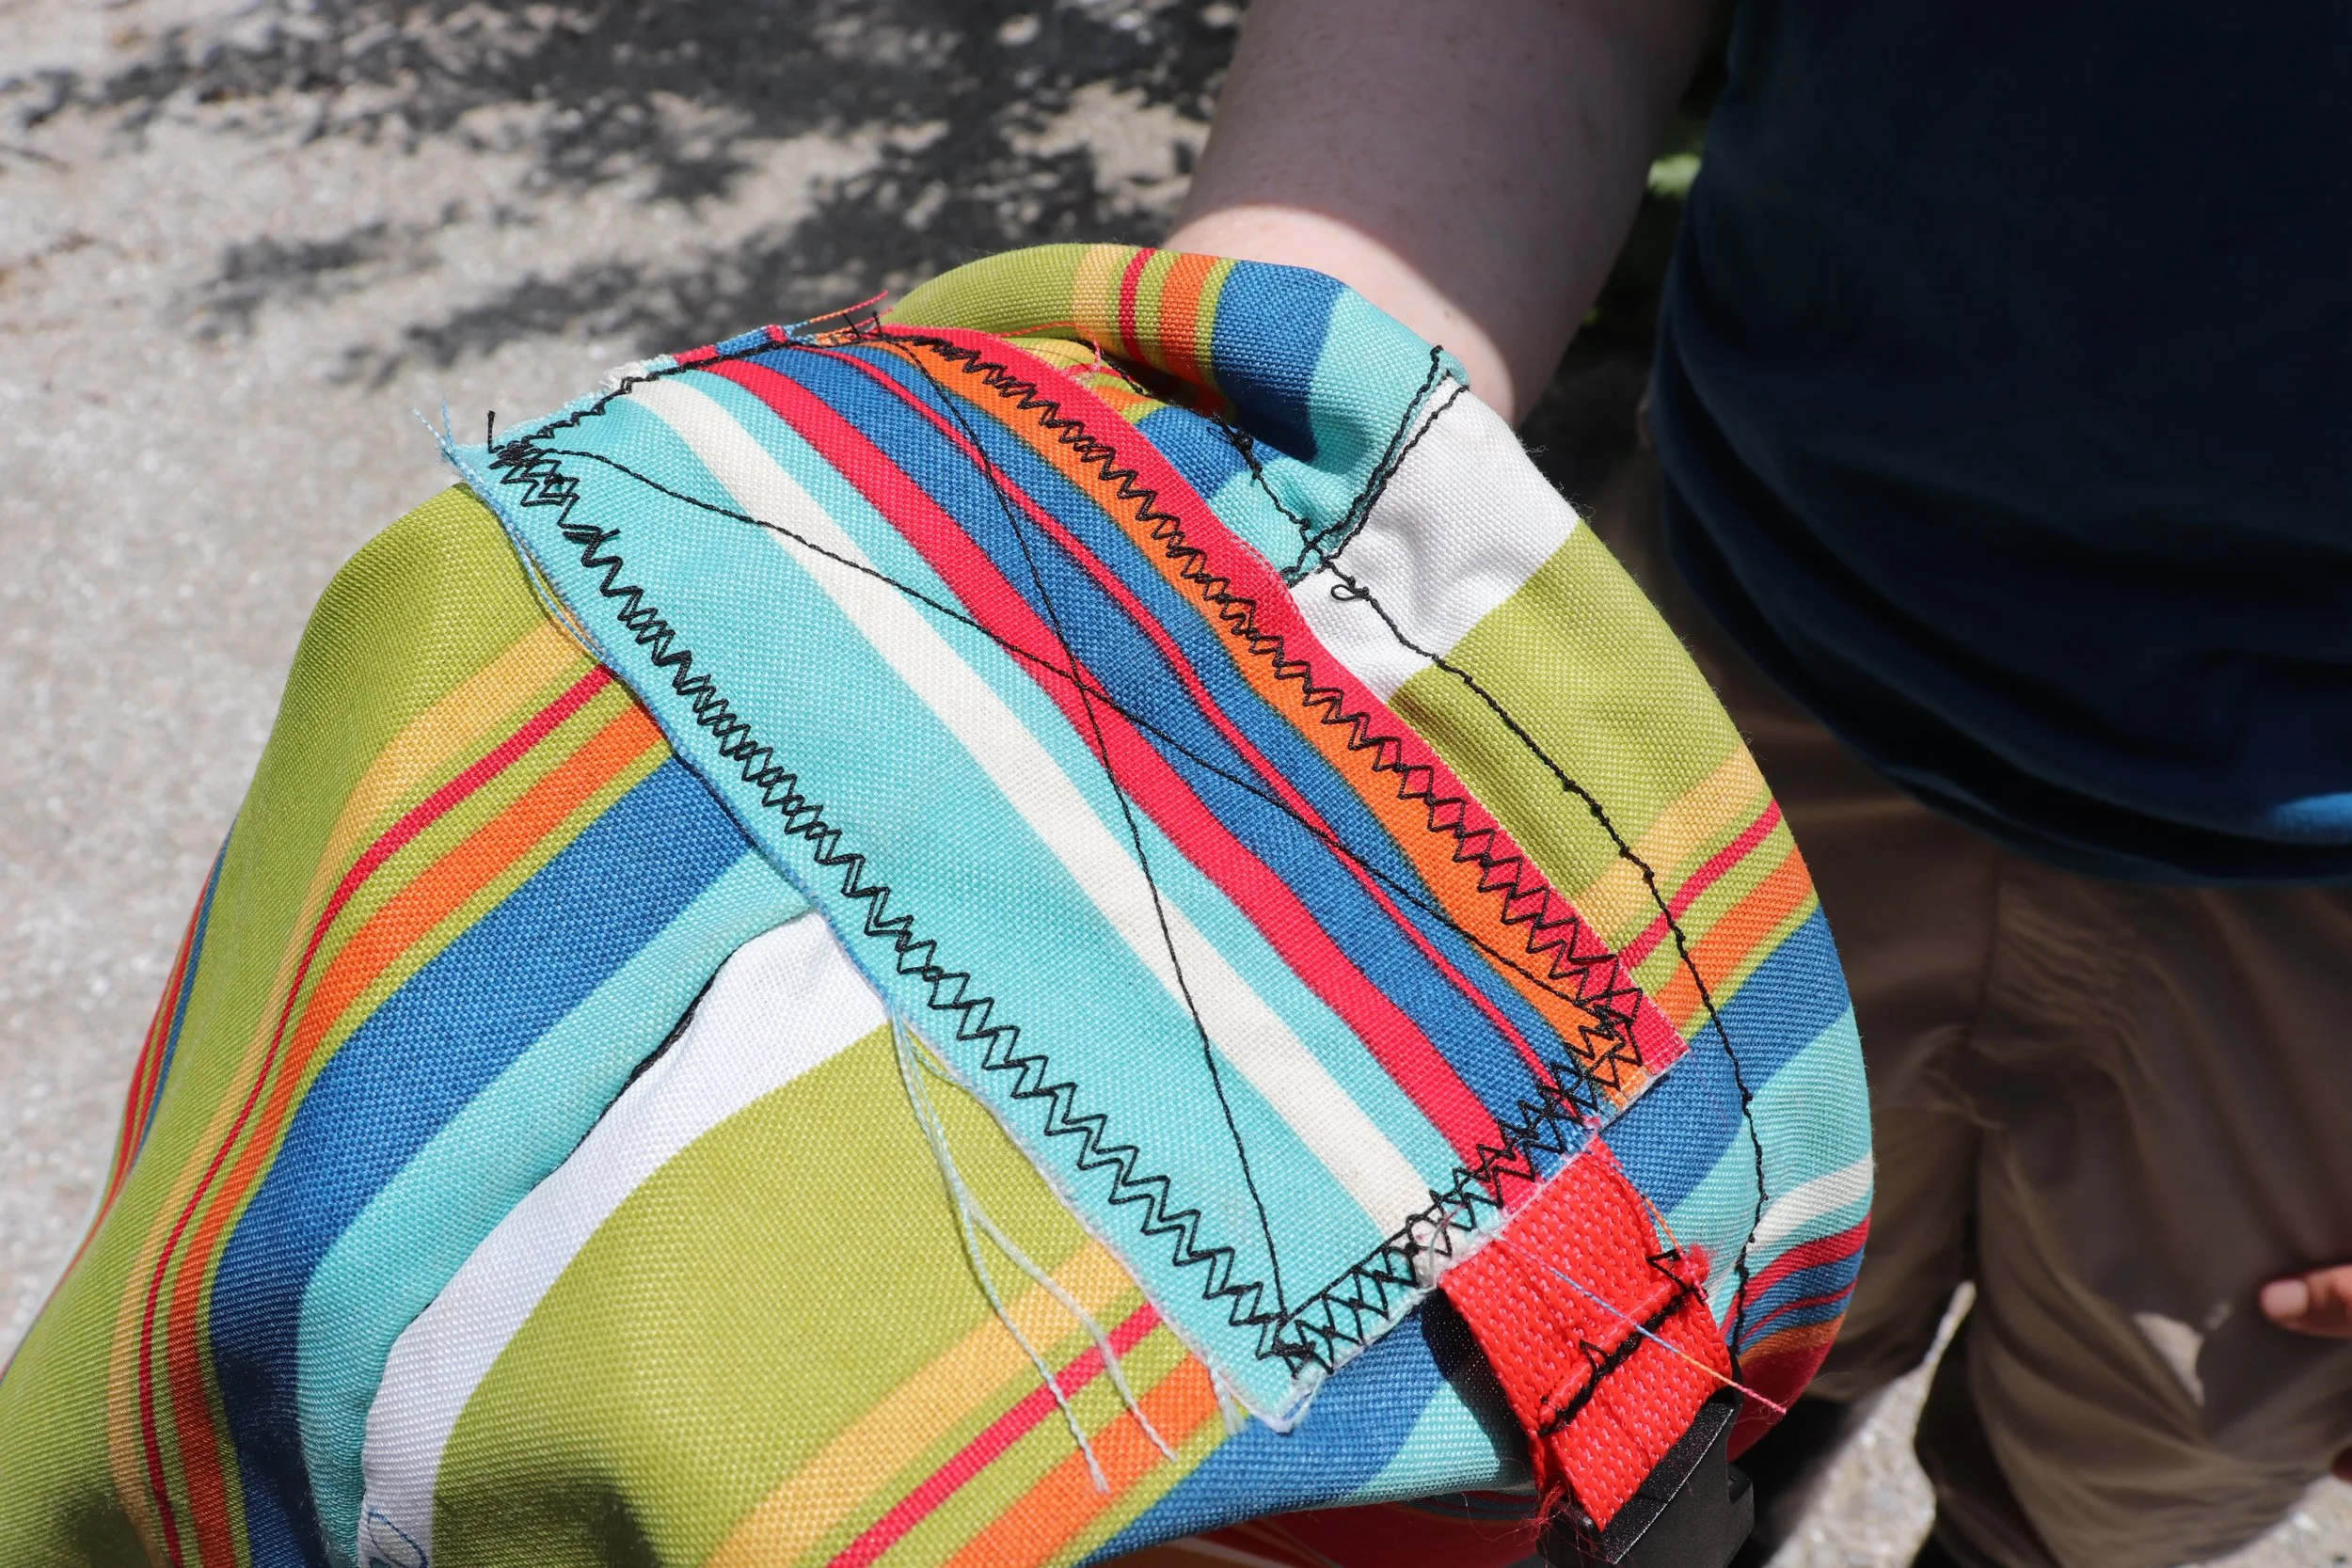
4. Hem all sides via ironing and folding raw edges or use a zigzag stitch on the machine.
5. With fabric turned inside out (wrong side out), bring the long sides together, pin, and to sew into a tube.
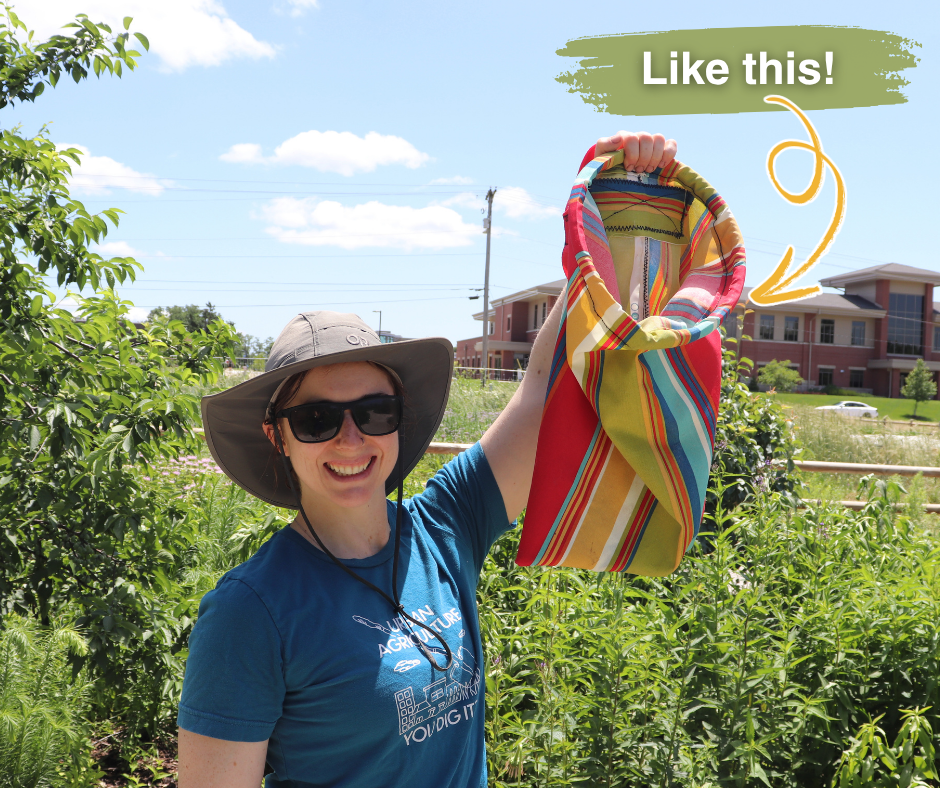
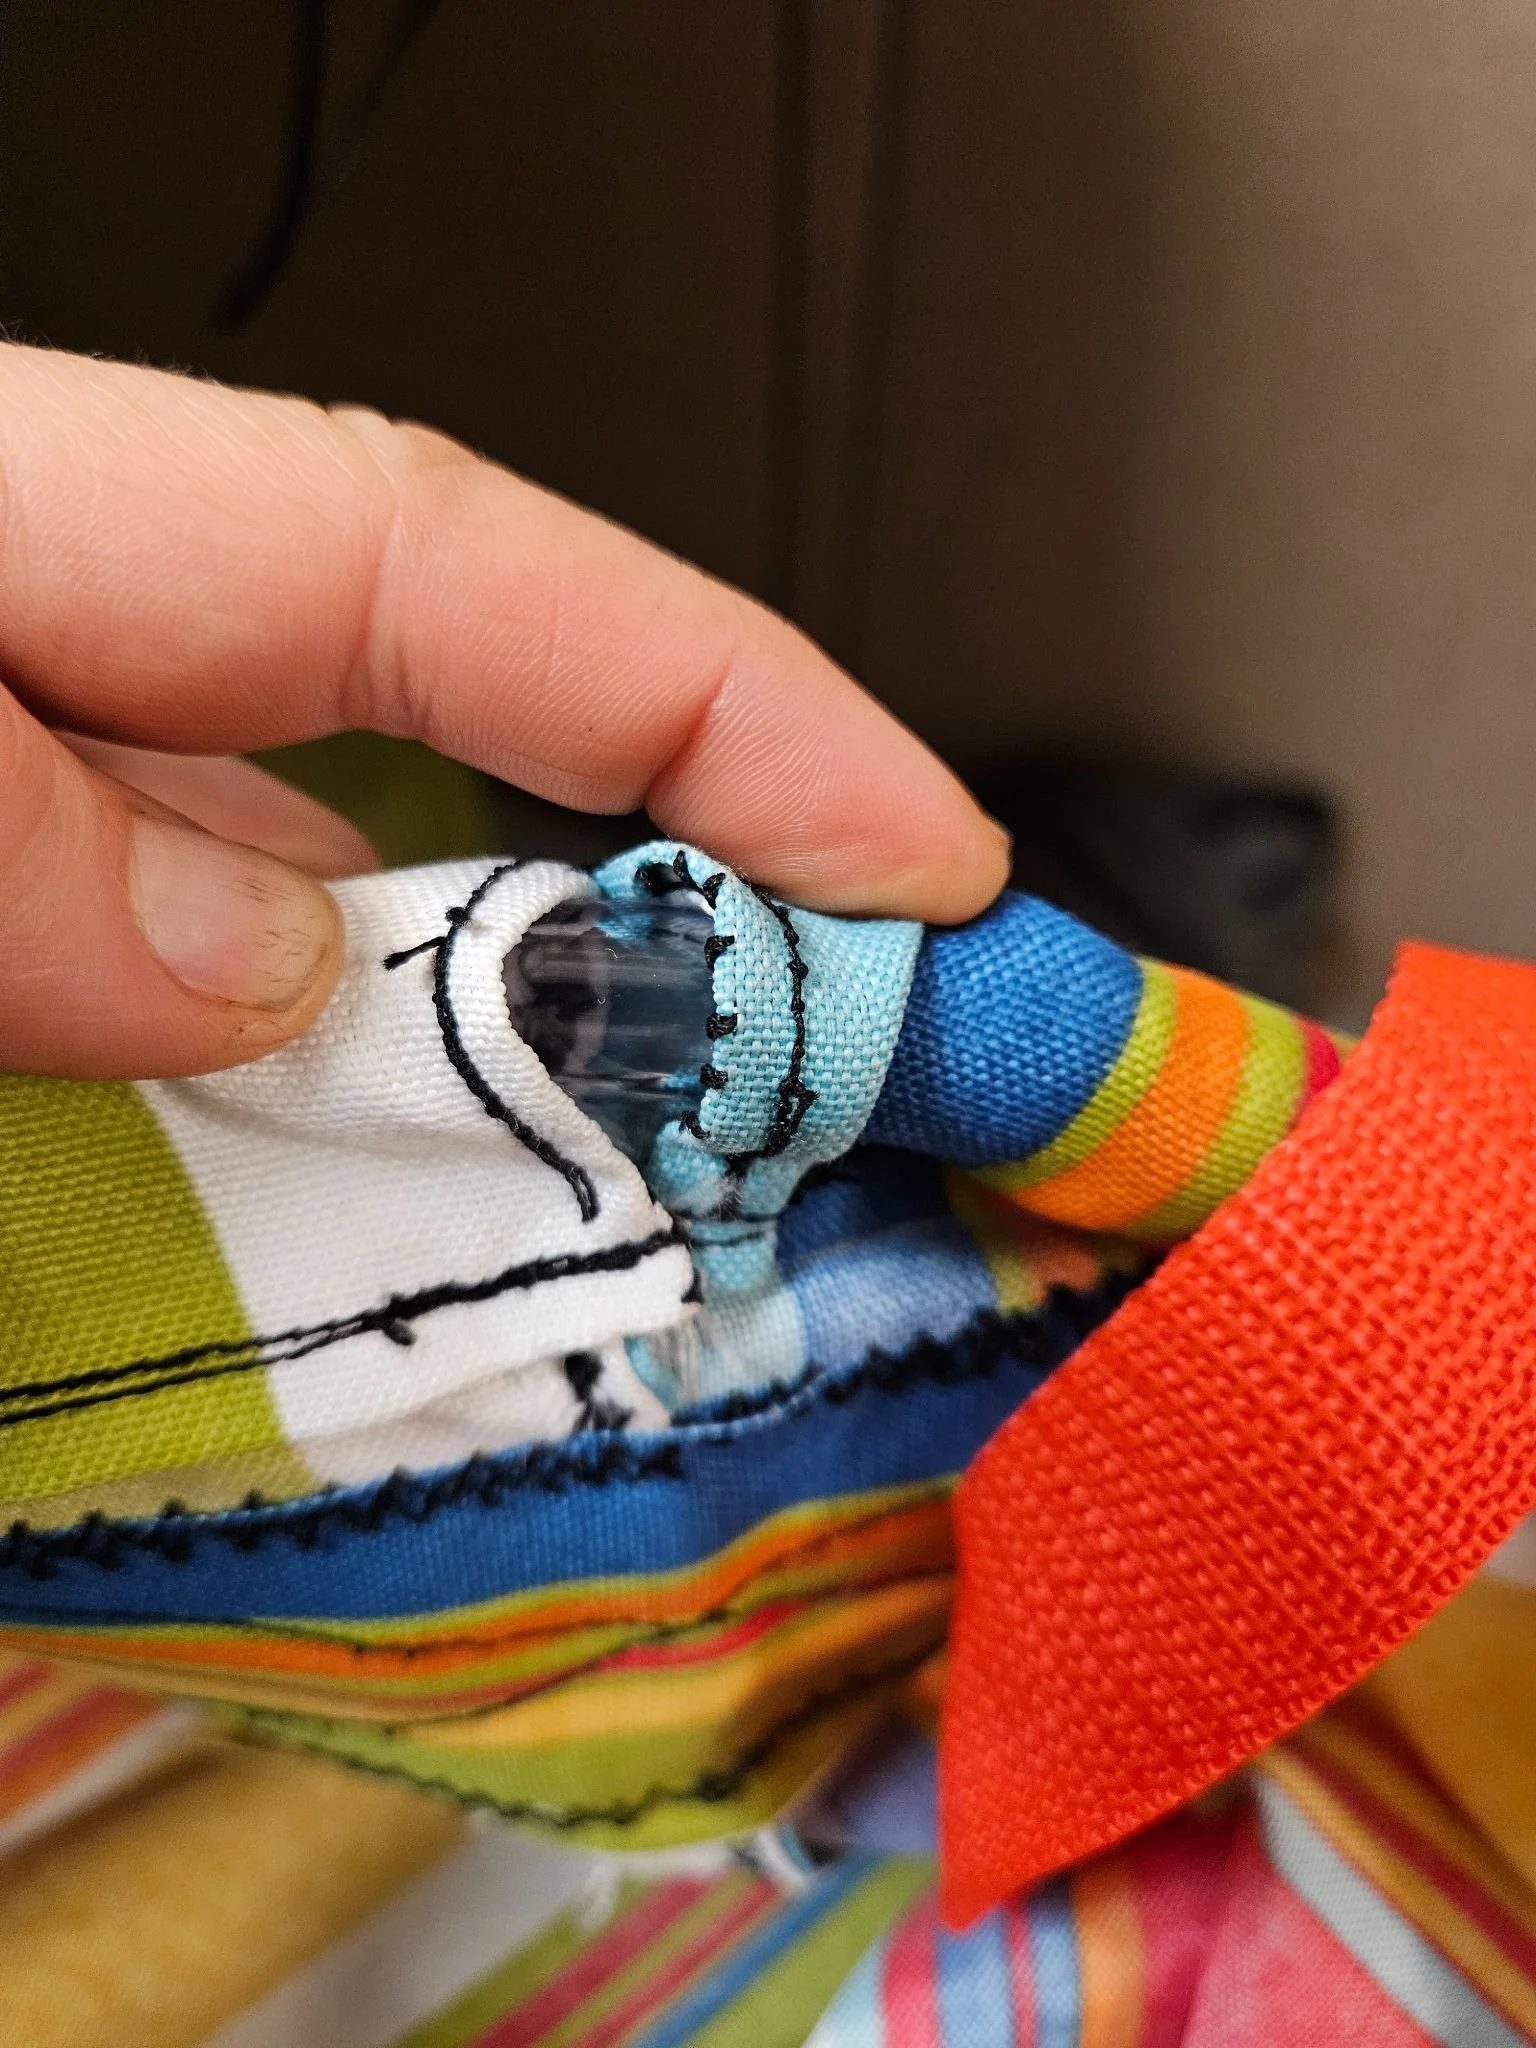
Important: to make a secure entry point for the tubing, do not sew the top inch together. This split will be where the tube is threaded when rolled over. (Pictures below.)
6. Still working wrong side out, on the top edge, take the vinyl tube as a guide and pin over it.
Note: From the bag’s top hem to where it attaches to the inside of the bag, it takes ~3 inches of fabric to cover it at the tube size listed in the instructions. Option to secure the tube seam twice by sewing it twice.
Tip: Taking more fabric here to account for tubing yields a shallower bag.
Tip: The V where the tube will insert needs to be on the inside so the bag is secure. The last joined spot on this seam will be the top of the bag.
Tip: Check how your tube sits by threading it through your new top seam. If you are making two bags, you will have 6 feet of tube, so it will not sit comfortably closed in the bag. You can trim the tubing here to fit, or wait until the bag-finishing steps toward the end.
V Seam Example:
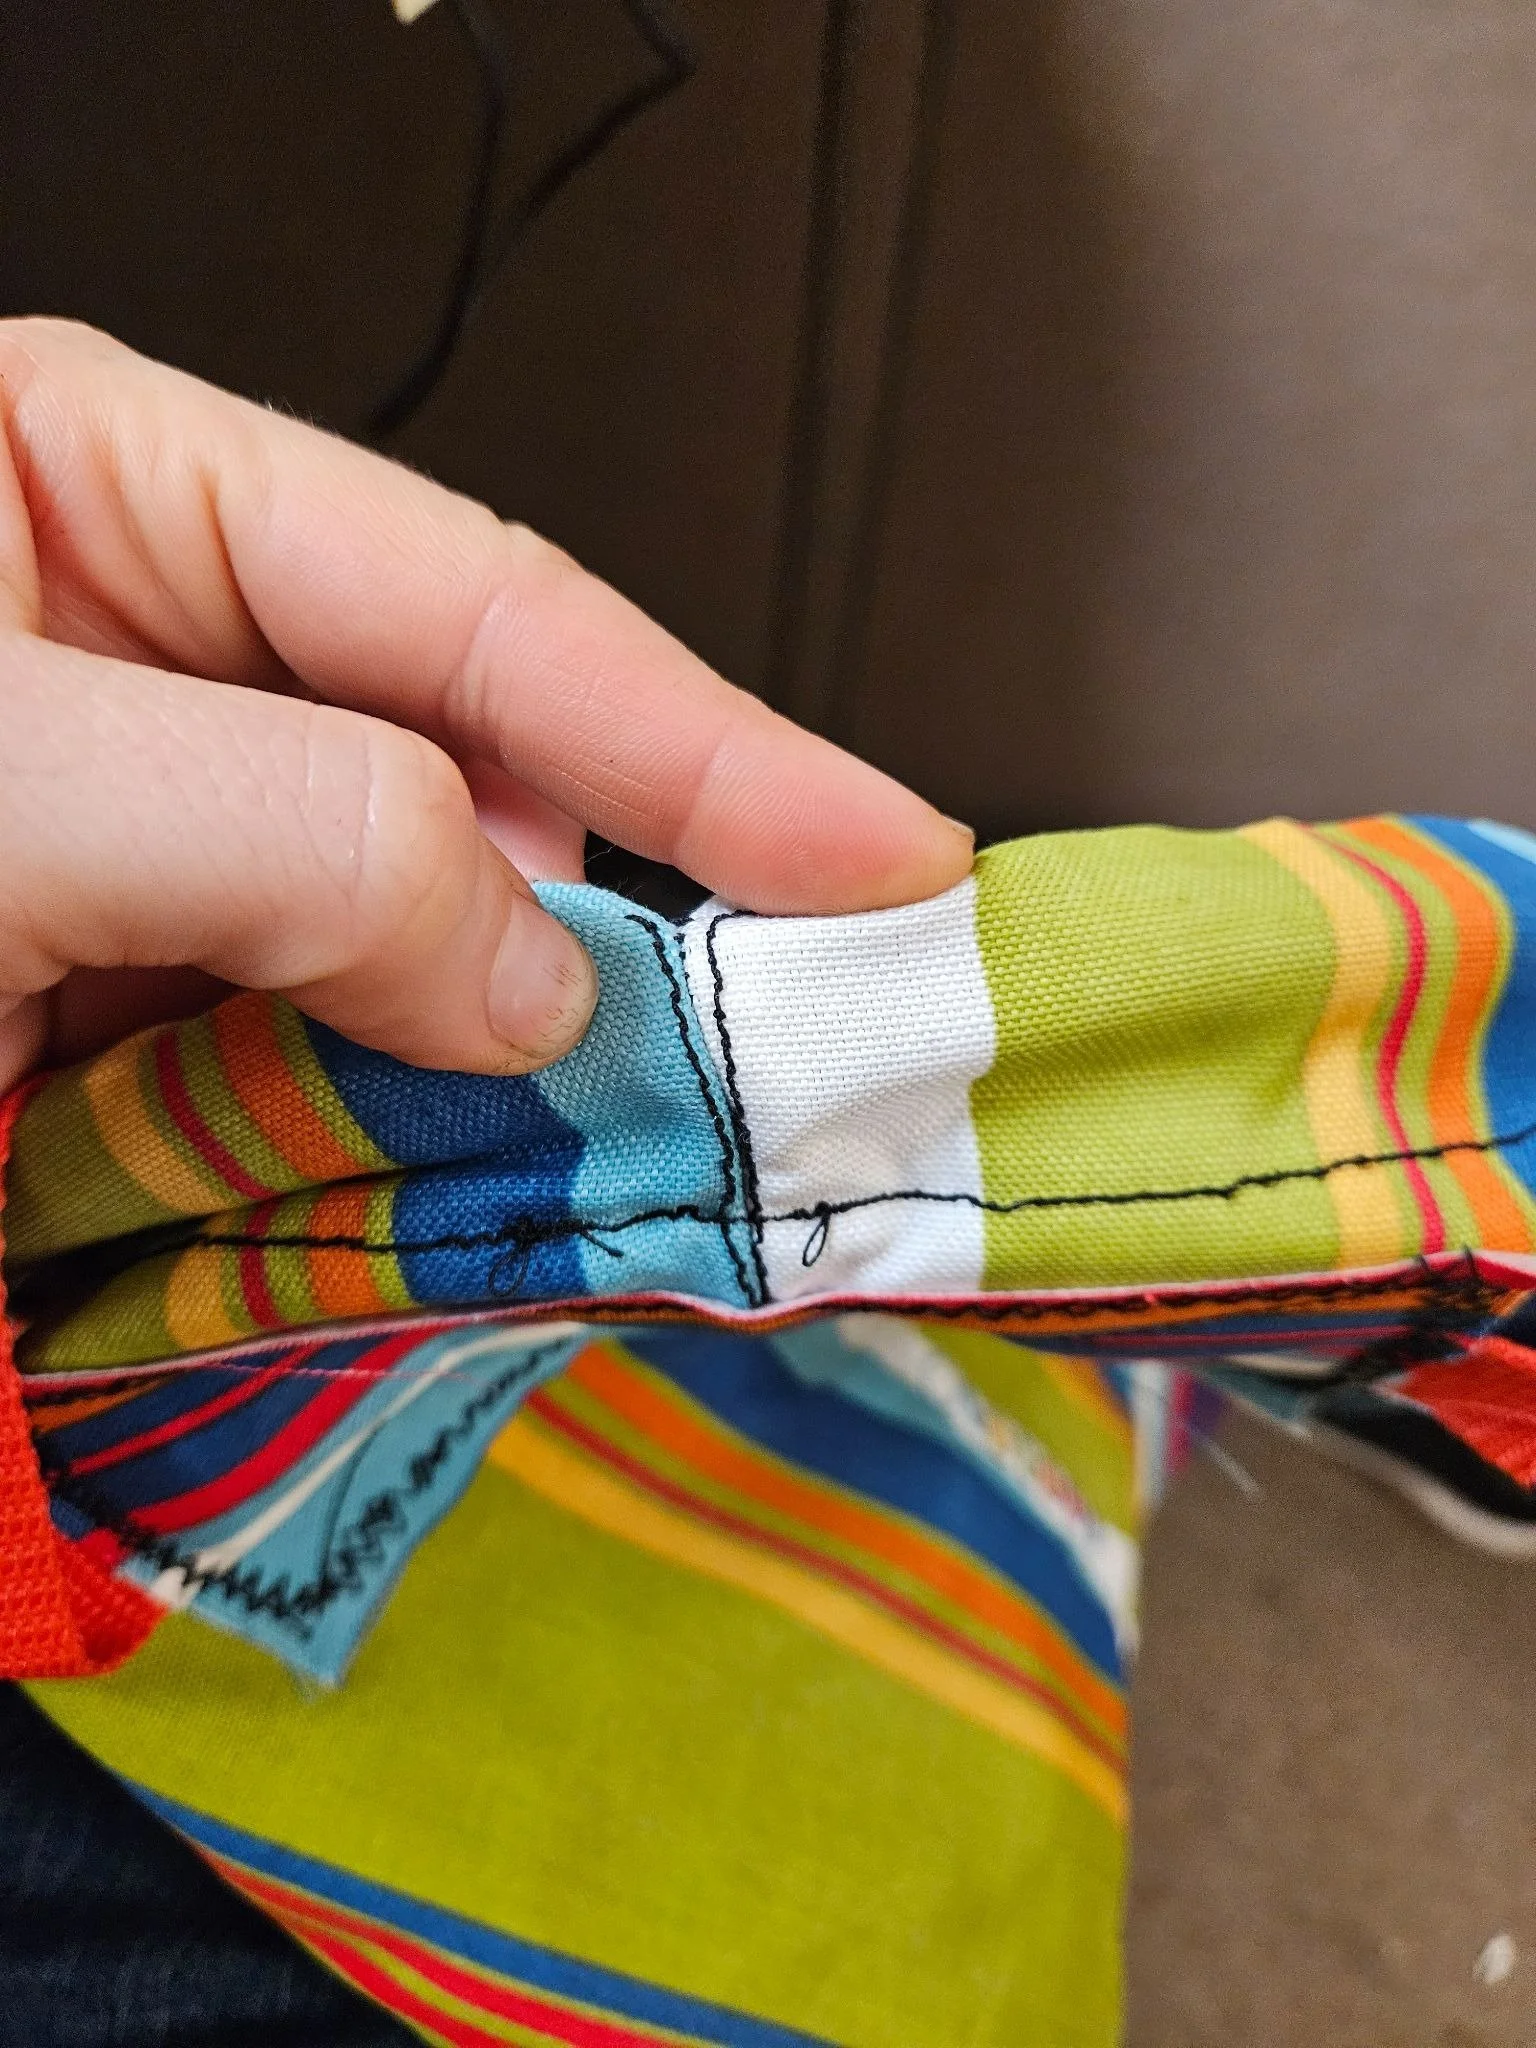
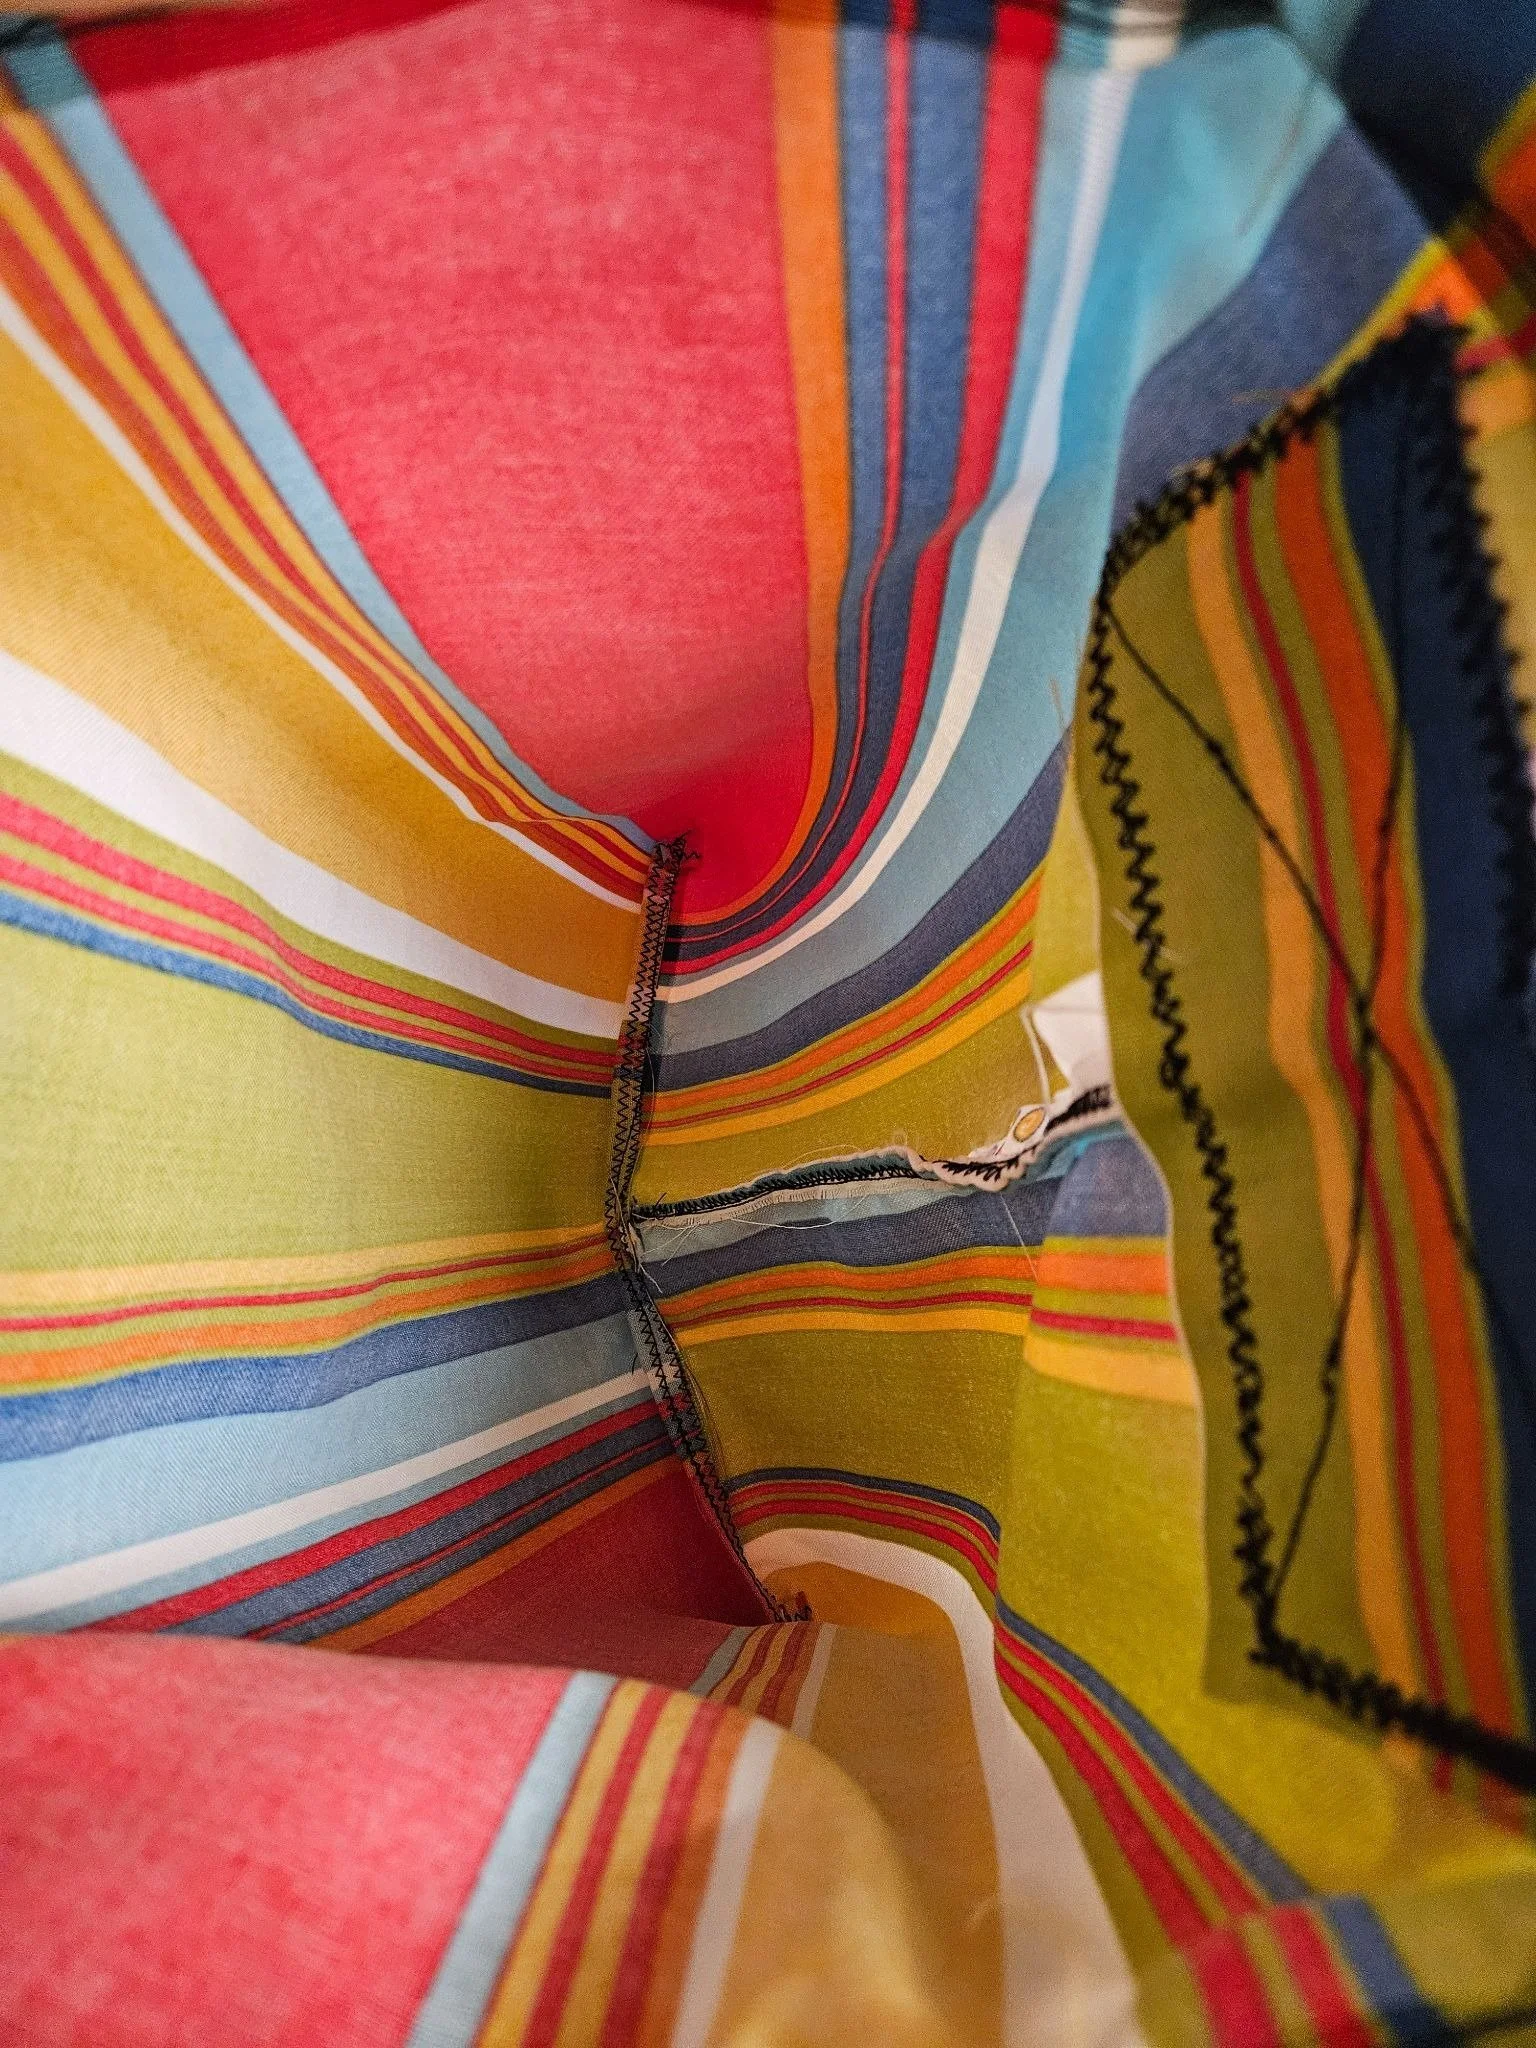
7.Still working with the bag wrong-side out, rotate the bag so the long side seam sits centered on the side panel rather than at a corner (unlike a pillowcase). Flatten the bottom edge, pin in place, and sew the bottom closed.
Tip: If positioned correctly, the seams inside the finished bag will form a “T” shape. This perpendicular seam placement helps the bag sit open more easily.
Example:
Bag Strap Instructions
8. Using the remaining outdoor fabric, make two patches, each 6.5 inches long and 2.5 inches wide.
9. Turning the bag right side out, take your 4 feet of nylon strap and position and pin it 2 inches from the top of the top, and about a quarter inch from the top hem, which makes the tubing threading area. You will be attaching the patch on the seam side of the bag so that it lies flat against the body.
Very Important Strap Attachment Info: For as much variable sizing as possible and use as much of the nylon strap, the strap should NOT be attached in the center of the fabric. You should offset it. On what will eventually be your buckle side, you’ll have about 3 inches free (less after hemming), whereas on your locking clasp side, you’ll have the remainder of the 4-foot strap.
10. After positioning your Nylon strap, take your patch on the right side of the fabric and take your other support patch on the inside of the fabric. Try to align all the corners of the patches on the inside (pins can help do this in stages), then sew all the corners of the patches (penetrating through the top patch, the bottom patch, and the nylon strap on the sides).
Tip: If you had previously threaded your tubing to see how it would fit, you have to remove it at this step so it fits under the foot of your machine.
Tip: Using a zigzag stitch can help keep this secure.
11. After sewing the corners, sew an X across the entire patch to lock the patches and strap further into place.
Like so,
Strap Buckle Assembly
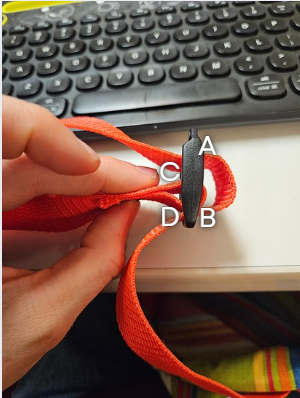
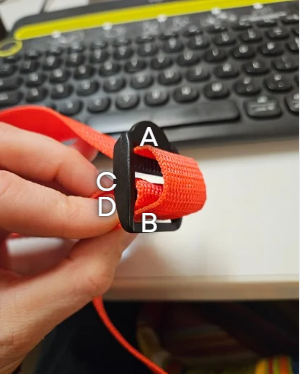
12. Separate the parachute buckle from the locking clasp. With the nylon strap affixed to the back, now take the buckle and thread it on the short ~3 inch side. Hem the raw end or not, sew the strap closed.
13. Take the strap adjuster (pictured above as threaded) and take the strap through B then the A side (with the point) furthest away from the bag.
Tip: the strap adjuster goes on first before the three-prong clasp.
14. Next thread the clasp, three prong buckle through its two loops, making sure the three prongs are facing out on the webbing you just threaded.
15. Finally, take the raw end of the strap, folding it back over and threading it through C and D. To finish the strap, sew the raw edge (hemmed or not) to itself like the picture.
Tip: if you get stuck, follow this YouTube tutorial!
Finishing
16. If you haven’t threaded your tubing into the slot, thread it. You will need to trim the tubing if you have not already.
17. Work the tube’s raw cut ends so that the ends are not at the entrance but opposite in the fabric tube. This is so it doesn’t add a lot of pressure to the entrance.
18. Trim loose threads.
19. Take a lighter to singe and seal the edges of nylon webbing.
Tips!
Measure twice, cut once.
Try to account for seam allowance. I didn’t do the best job at that, and some of my measurements were off.
Ensure the strap isn’t twisted before sewing it.
The buckles should face out on the strap so they are away of the body.
You may have issues with your machine’s tension when using the heavy-duty thread. Our team had to put the top tension on almost max to sew using the heavy-duty thread.
Congrats! Time to Test Your Harvest Bags
After completing your harvest bags, it’s time to take them for a test ride! If you’re doing this in the spring, try harvesting hearty leafy greens or bundles of cilantro or parsley using the bag. If you’re in the middle of summer, okra and peppers work great as test crops in the bags.
And if you have improvements on the design or instructions for the bags, please let us know. Email us, we’d love to hear from you.
Happy harvesting!